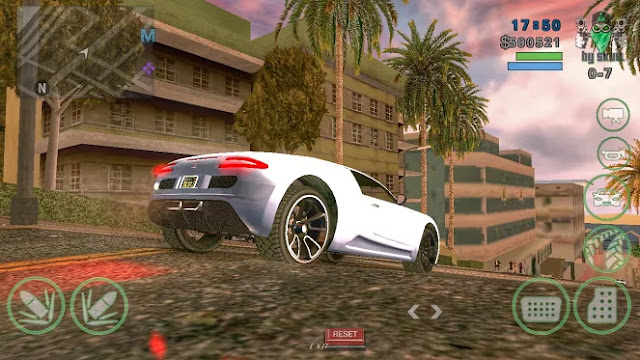
2017

Airplane Mod Pack for Android Download from GTAAM.Blogspot.com

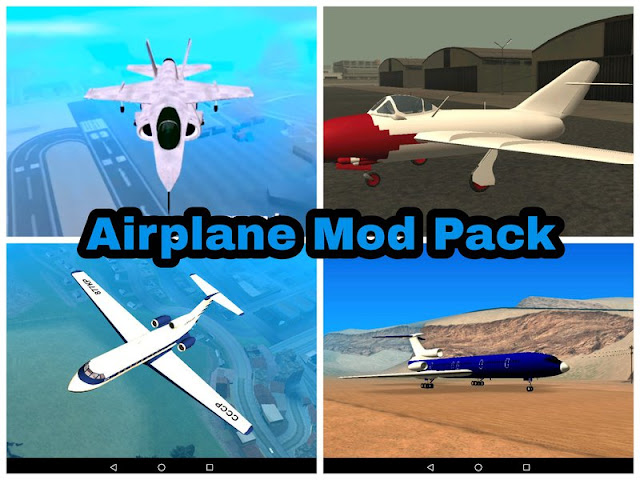
After car mods and car mod packs here comes an Airplane Mod Pack for GTA San Andreas Mobile. This mod pack contain 4 new airplanes for GTA San Andreas Mobile (Android). This mod pack does not require computer. The maker of this mod pack is "RIZKY GAME" and others (name below). You can install this mod pack using IMG Tool Android. After replacing ".dff" files do not forget to move "carcols.dat" file to the specified directory (mentioned below). The mod pack is cool and has no bugs. Also it is first Airplane Mod Pack for GTA SA Android.
To install this mod please follow these steps:

Credits:

 Shon Racer (for Tupolev Tu-154, Yakovlev Yak-40)
 RIZKY GAME (for GTA V Mammoth Hydra)
 Los Santos guy (for Mikoyan Gurevich MiG-15)

Before You Start

• If you don't have PC then you can install this mod with "img tool android" software (free in playstore). Steps are same. CLICK HERE to know how to use img tool android to install this mod (no need pc).
• To uninstall this mod, delete the moved files.

Step I: Download Lamborghini Gallardo v2 Car


• Download this mod from:

   Google Drive
   or
   Mirror Link

• Download IMG tool (Android)

  Download IMG Tool Android

• Download Alci's IMG tool:
   Download IMG Tool

Step II: Install this Mod in Your GTA SA Android

• First of all copy "carcols.dat" file and paste it to:
   /Android/data/com.rockstargames.gtasa/files/data/     <here>
*Make new "files" and "data" folder if doesn't exist

Now, If you don't have PC. You have to follow "img tool Android tutorial"! do not follow below steps!
And if you have PC you can follow these steps:
• Extract the downloaded mod (zip file).
• Now extract your ".obb" file using winrar. (PC).
• Open IMG Tool and open
   /(extracted obb)/texdb/gta3.img
• Find and replace all ".dff" files in this zip  and
   then goto Commands>Rebuild Archive and then exit.
• Now copy below file:
   /(extracted obb)/texdb/gta3.img (this file)
  and Paste it in your phone's:
  /Android/data/com.rockstargames.gtasa/files/texdb/             <here>
  *Make new "files" and "texdb" folder if doesn't exist

Step III: Enjoy the mod

• Now run the game and enjoy the mod.

New 3D Buttons GTA San Andreas Android

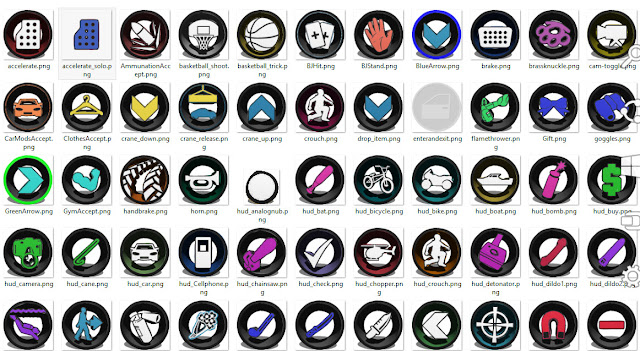
Here comes a new colorful and 3d buttons mod for GTA San Andreas Android. This mod will change the default controllers/on screen buttons with new vivid ones. The maker of this mod is "Muhammad Zauqie Firdaus". This mod requires computer. So make sure you have a computer before downloading this mod. All you have to do is just add these new textures in GTA San Andreas Android using Txd Fucker software.
To install this mod please follow these steps:


Before You Start

• Computer is required to install this mod.
• To uninstall this mod, delete the moved folder.

Step I: Download New 3D Buttons Mod GTA SA Android

• Download Mod from:
  Google Drive
  or
  Mirror Link

• Download  TXD Fucker:

   Download TXD Fucker


Step II: Install this Mod in Your GTA SA Android

• Extract the downloaded mod (zip file).
• Extract your ".obb" file using winrar (Use computer). 
• Now run TXD Fucker and open this file
  /(extracted obb)/texdb/mobile/mobile.txt
• Click on Import > witht alpha and select all files inside "with alpha" folder.
• Again click on Import > without alpha and select all files inside "without alpha" folder.
• Exit and Copy below file and folder:
   /(extracted obb)/texdb/txd/ (this folder)
  and Paste them in your phone's:
  /Android/data/com.rockstargames.gtasa/files/texdb/             <here>
*Make new "files" and "texdb" folder if doesn't exist

Step III: Enjoy the mod

• Now run the game and enjoy the mod.

GTA SA Cartoon Mod Pack v2 Download minecraft skin gta sa android

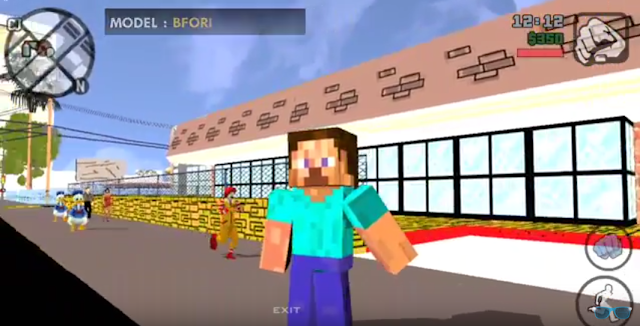
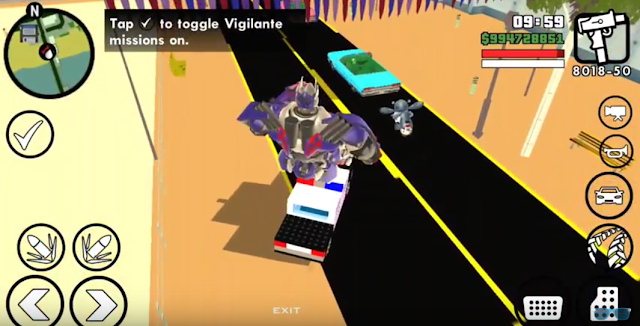
Second version of the famous GTA SA Cartoon Mod Pack is here. A total conversion mod for GTA San Andreas Mobile (Android) which will convert San Andreas in to cartoonish graphics just like Minecraft or Borderlands. This mod pack has all map converted to cartoonish. This mod pack has some famous characters like Mario, Transformers, Minecraft, Bunny and Sponge-bob including some famous cars. The maker of this mod pack is "Orkhan Aliyev". Those who like this mod pack should support the maker of this mod pack by giving him ideas, bug reports etc in his email "aliyevorxan3@gmail.com". Just move the files and run the game, the mod pack will work fine.

Beta Features

•  San Fierro converted to cartoon
•  Las Venturas converted to cartoon
  Added new cartoon skins
  Added new map: Mario Kart
  New Cars, Planes and Helis
  New cartoon skins, characters (almost 30.).
  New animated cars from cartoons
  Improved weather and new timecyc (by cr. Martin)
  Cartoonish roads, buildings and everything.
  New Cartoonish Skybox (Cr. Martin)
  Some cleo mods and more...

Credits

  New Timecyc by cr. Martin
Special thanks to Orkhan Aliyev

Do not use this mod pack or any content inside this mod pack without the permission of the author.

To install this mod pack please follow these steps:

Before You Start

• This is version 2 of Cartoon Mod Pack. Has some more features. See Features list above.
 To uninstall this mod pack, delete the moved files.

Step I: Download GTA SA Cartoon Mod Pack Version 2

• Download this mod from:
  MEGA
  or
  Mirror Link

• Download Cleo Android:
  Download Cleo Android

Step II: Install this Mod in Your GTA SA Android

• Backup GTA San Andreas Android data files and save game files. If you don't want to backup, then skip next two steps. If you want to backup then copy data files. You can find data files and save files by going to:
   /Android/obb/com.rockstargames.gtasa/      <=== Copy the "com.rockstargames.gtasa" folder!
  And move it to any safe place. So if this mod don't work you can revert back to original game with your previous mods and saved game files etc.
• Delete the "com.rockstargames.gtasa" folder present inside:
   /Android/data/         <here>
• Extract the mod pack. You can use "WinRar" if you are in computer and "ES File Exlporer" if you are in Android.
• Move the "com.rockstargames.gtasa" folder to:
  <YOUR PHONE>/Android/          <here>
 The mod pack is installed. Now run the game.

Step III: Enjoy the mod pack

• Now run the game and enjoy the mod pack.

Screenshots:

GTA SA Cartoon Mod Pack v2 Download

GTA SA Cartoon Mod Pack v2 Download transformers skin mod pack download

Grove Sreet Gang Season 1- 5 Missions Pack Android Mobile Gtaam

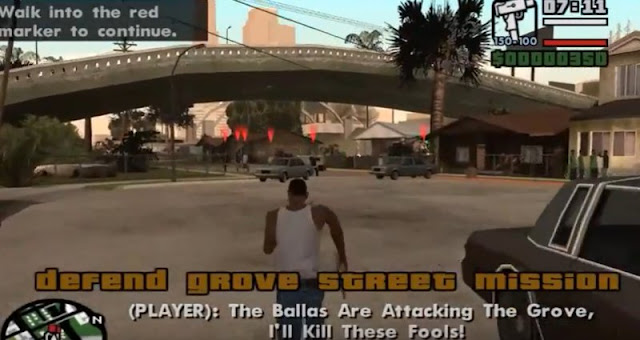
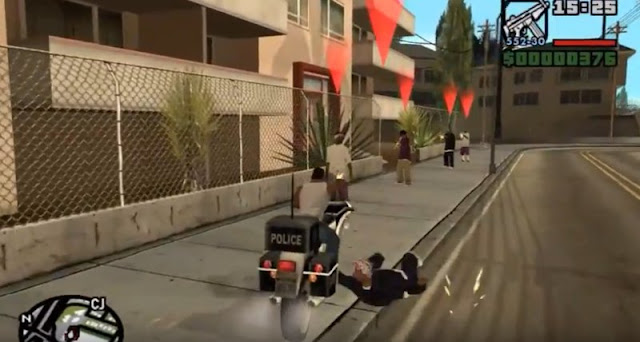
GTA San Andreas has a long story line but those who still want to do some missions can install this cool mission script mod. This mod will add five new missions in GTA SA Android. Yes new missions can be made in GTA San Andreas Android (and PC) but you have to know coding (like c++ or cleo). The maker of this Mission Pack is "SpiderMight" and "Prashant Dubey" has ported it to GTA SA Android Mobile. To run this mod you have to install cleo Android. This mod contains 5 new missions which can be completed by you. The story follows Gang members of Los Santos. A very interesting story. 


Mission Details:

Mission 1 is called " Defend the Grove" - Stop the ballas from invading Grove Street. 
Mission 2 is called "Attack on the ballas" - Get payback and kill the Ballas for invading. 
Mission 3 is called "Drug Dealers" - Drug dealers are putting poison in the drugs that are sold to Grove Street Gang Members, you must put a stop to that.
Mission 4 is called "Balla killer" - Hit the streets and kill all the Ballas you see, clean up the street trash. 
Mission 5 is called "Balla Vagos Drug Deal Ambush" - A homie scopes out a factory with Ballas and Vagos at the scene, you ambush the gang members and take the drugs and money. 

To install this mod please follow these steps:


Before You Start

• Cleo Android is required to run this mod.
• To uninstall simply delete the moved files.


Step I: Download Grove Sreet Gang Season 1- 5 Missions Pack Android

• Download Mod:
  Download Mod
  or
  Mirror Link

• Download Cleo Android:

  Download Cleo Android


Step II: Install this Mod in Your GTA SA Android

• Extract the downloaded mod (zip file).
• Move the all files except "readme.txt" to:
  /Android/data/com.rockstargames.gtasa/       <here>


Step III: Enjoy the Mod

• Run the Game and enjoy the mod. To activate mod open the Cleo Script Menu and choose this mission script. Then Go to Question Mark sign on map ("?") to start these missions.


Screenshots:

Grove Sreet Gang Season 1- 5 Missions Pack Android by prashant dubey

Grove Sreet Gang Season 1- 5 Missions Pack Android screenshots

GTA V Interactive Phone Mod Version 2 (Everything Working)

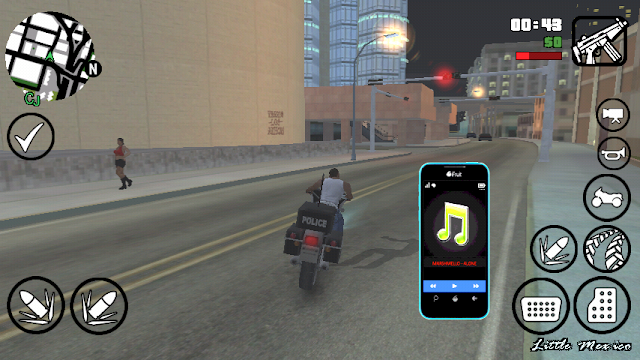
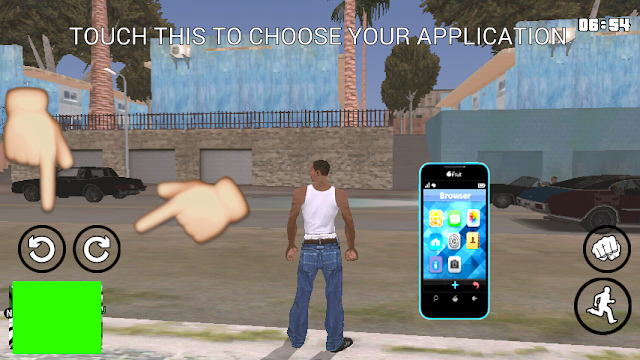
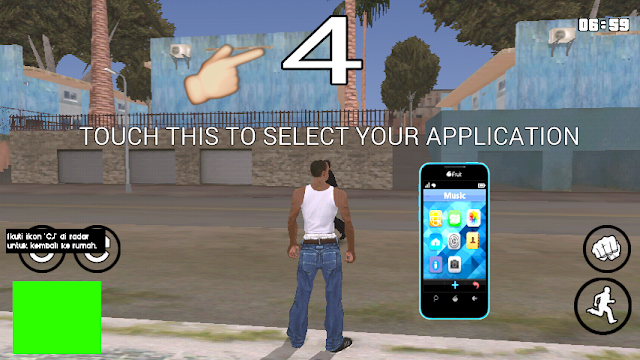
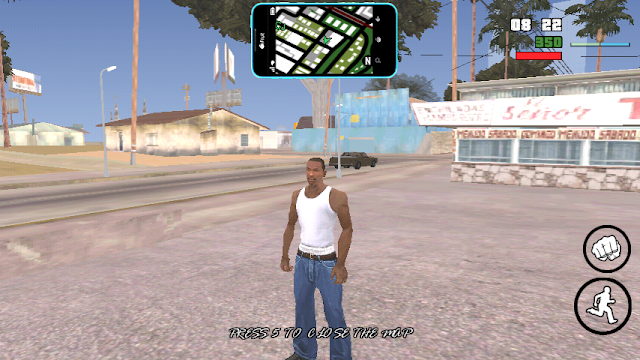
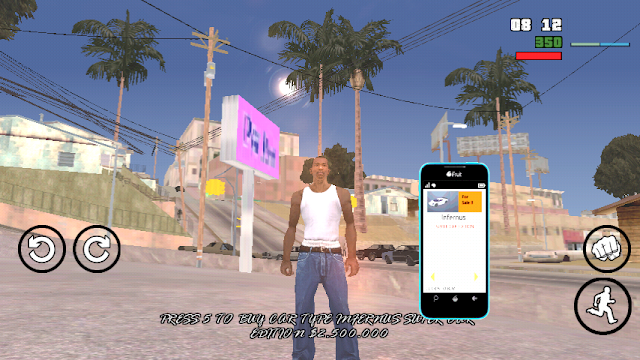
For those who wanted GTA V Phone mod, here it is. This mod will add an interactive working phone just like GTA V in GTA San Andreas Android (Mobile). The maker of this mod is "Rizky Aldi Game". It is a cleo mod so make sure cleo Android is installed in your phone. This phone will work just like GTA V. You can use it as map, to play songs, to take a picture or to surf internet. Special thanks to "Rizky Aldi Game" for sending this mod pack to us. You can also send your own mods to us by Clicking Here.

Features:

• Working Browser
• Maps
• Music Plauer
• Weather Updates
• Options
• Contacts
• Camera

To install this mod, follow these steps:


Before You Start

• Cleo Android is required to run this mod.
• If you see white texture on phone like below image, then swipe your finger from point #4 to #6 (just like you pull notification bar).


If you see white texture on phone like below image, then swipe your finger from point #4 to #6 (just like you pull notification bar).
• To uninstall this mod, delete the moved files.

Step I: Download GTA V Phone Mod GTA SA Android

• Download Mod from:
  Google Drive
  or
  Mirror Link

• Download Cleo Android:
  Download Cleo Android


Step II: Install this Mod in Your GTA SA Android

• Extract the downloaded mod.
• Move the "txd" folder present inside "TXD+BONUS (GTA V EFFECT)" folder to:   /Android/data/com.rockstargames.gtasa/files/texdb/         <here>
• And move the "models" folder present inside "TXD+BONUS (GTA V EFFECT)" folder to:   /Android/data/com.rockstargames.gtasa/files/        <here>
• Also move the "audio" folder to:   /Android/data/com.rockstargames.gtasa/files/        <here>
• Now move all the files inside "CLEO (NO CRASH)" folder to:
   /Android/data/com.rockstargames.gtasa/         <here>
• And move "adjustable.cfg" file to:

   /Android/data/com.rockstargames.gtasa/files/         <here>
Mod is installed!

Step III: Enjoy the mod

• Now run the game and enjoy the mod.

How to use this mod:

Here's a picture tutorial of how to use this cool mod. This tutorial and picture credit also goes to "Rizky Aldi Game".

GTA V Interactive Phone Mod (with Fix) installation tutorial gtaam
Touch in number 1 and 7 together to activate this mod

how to use GTA V Interactive Phone Mod (with Fix) with pictures
You can use these two buttons to navigate menu

how to use GTA V Interactive Phone Mod (with Fix)
To open the application touch at point number 4

Screenshots

GTA V Interactive Phone Mod (with Fix) by Rizky Aldi gaming version 2


GTA V Interactive Phone version 2 Mod (with Fix)

GTA V Interactive Phone Mod (with Fix)

Project V Max (Complete Edition) Mod Pack GTA SA Android

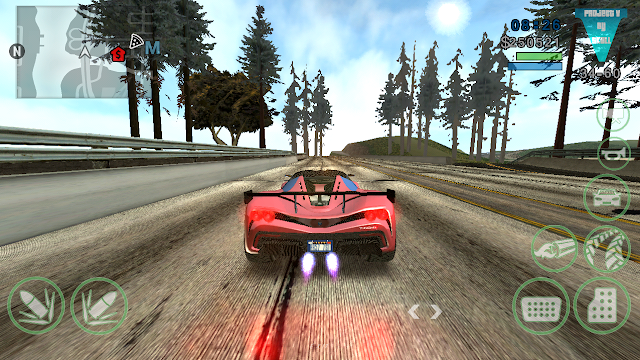
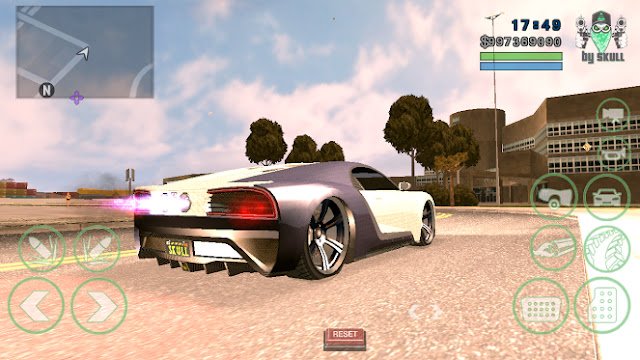
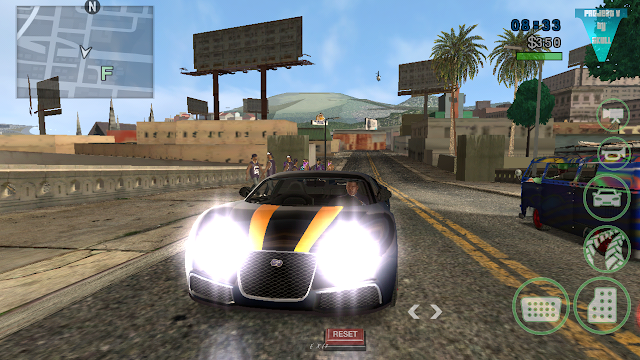
A total conversion mod for GTA San Andreas Mobile (Android) which will convert San Andreas in to Grand Theft Auto V. This mod pack is one of the biggest mod pack for GTA San Andreas Mobile (Android). It has one of the most high quality textures, enb mods, vehicles, weapons and lots of cleo scripts. The maker of this mod pack is "Jerrad Skull". You need a good specs device to run this mod pack. You can change weapons like GTA V, You can see a total new hud like GTA V, Many improved textures like new nitro and fire textures, new vehicles including cars, bikes, planes and helis and much more.

To install this mod pack please follow these steps:

Before You Start

• This mod pack will replace default vehicles, weapons, textures etc with GTA V vehicles, weapons and textures.
 To uninstall this mod pack, delete the moved files.

Step I: Download GTA V Max Complete Edition Mod Pack

• Download this mod from:
  MEGA
  or
  Mirror Link

• Download Cleo Android:
  Download Cleo Android


Step II: Install this Mod in Your GTA SA Android

• Backup GTA San Andreas Android data files and save game files. If you don't want to backup, then skip next two steps. If you want to backup then copy data files. You can find data files and save files by going to:
   /Android/obb/com.rockstargames.gtasa/      <=== Copy the "com.rockstargames.gtasa" folder!
  And move it to any safe place. So if this mod don't work you can revert back to original game.
• First of all copy the "obb" files of your GTA San Andreas Android to a safe location. Just copy the "com.rockstargames.gtasa" folder present inside:
   /Android/obb/         <here>
  And move it to a new safe location.
• After moving the "obb" files delete the "com.rockstargames.gtasa" folder present inside "/Android/obb/   <here>"
• Now uninstall the "GTA SA" from your phone. Make sure you backup the "apk" file of GTA SA Android before doing this. You can use "APK Extractor" program (free in playstore) to extract the apk of GTA SA.
• Extract the mod pack. You can use "WinRar" if you are in computer and "ES File Exlporer" if you are in Android.
• Now install the "apk" file present inside this mod pack.
• Move the "com.rockstargames.gtasa" folder present inside "Patchfile" folder (inside mod pack) to:
  <YOUR PHONE>/Android/data/          <here>
• Now move the "obb" files folder (com.rockstargames.gtasa) you backed up in above steps to:
  
/Android/obb/   <here>
Now restart your phone. 

Step III: Enjoy the mod pack

• Now run the game and enjoy the mod pack.

Screenshots:

Project V Max (Complete Edition) Mod Pack GTA SA Android GTA V cars mod pack

Project V Max (Complete Edition) Mod Pack GTA SA Android best mod pack gtaam

Project V Max (Complete Edition) Mod Pack GTA SA Android by jerrad skull

Project V Max (Complete Edition) Mod Pack GTA SA Android

Pada Kesempatan Kali ini saya akan membuat posting mengenai Tutorial cara membuat Flow Chart menggunakan sebuah software, software itu ialah Dia. berikut ini adalah tutorial untuk membuat flow char dengan bantuan software dia. oh iya "Dia" itu bukan untuk menunjukkan kata ganti orang, tapi itu emang nama softwarenya :D hehe. langsung saja ke tutorial membuat flow chart menggunakan software dia.

1. Buka software "Dia" dengan cara klik dua kali


Maka tampilannya akan muncul seperti ini :
Proses saat membuka

Tampilan Software "Dia"
2. Kemudian buat flow chart seperti gambar dibawah ini menggunakan tools yang sudah disediakan
Buat Flow Chart

3. Hubungkan flowchart dengan garis sehingga membentuk gambar seperti dibawah ini
Hubungkan Flow Chart
4. Kemudian simpan file dengan cara seperti gambar dibawah ini
Simpan File

5. Hasilnya akan seperti pada gambar dibawah ini

Demikian tutorial menggambar flow chart dengan menggunakan software dia yang dapat saya sampaikan. Dengan menggunakan software ini akan memudahkan seorang programmer yang sedang menggambar flow chart menggunakan software

Pada kesempatan kali saya akan memberikan source code dari program perhitungan sederhana dengan menggunakan bahasa pemrogramman c++. Source Code perhitungan ini dapat dengan mudah kalian pahami walaupun masih tergolong programmer pemula, karena saya menulisnya dengan rapi agar mudah dibaca oleh orang lain.


Langsung saja kita ke source code dari aplikasi perhitungan sederhana, copy source code di bawah ini dengan .cpp

 #include<iostream>
using namespace std;

int s;
int hasil;
int a,b;

int main ()
{
    cout << "Software Perhitungan Sederhana\n" << "---------------------------------\n" 
    << "Pilih Perhitungan!!!\n" << "1. Penjumlahan\n" << "2. Pengurangan\n"
    << "3. Perkalian\n"
    << "4. Pembagian\n\n" ;
    cout << "masukkan pilihanmu ";
    cin >> s;
   
    if (s==1)
    {
        cout << "Masukkan angka yang akan dijumlahkan!!!\n"
        << "Angka pertama ";
        cin >> a;
        cout << "Angka kedua ";
        cin >> b;
        hasil = a + b;
        cout << "Hasilnya adalah = " << hasil;
    }
    else if (s==2)
    {
        cout << "Masukkan angka yang akan dikurangkan!!!\n"
        << "Angka pertama ";
        cin >> a;
        cout << "Angka kedua ";
        cin >> b;
        hasil = a - b;
        cout << "Hasilnya adalah = " << hasil;
    }
    else if (s==3)
    {
        cout << "Masukkan angka yang akan dikalikan!!!\n"
        << "Angka pertama ";
        cin >> a;
        cout << "Angka kedua ";
        cin >> b;
        hasil = a * b;
        cout << "Hasilnya adalah = " << hasil;
    }
    else if (s==4)
    {
        cout << "Masukkan angka yang akan dibagi!!!\n"
        << "Angka pertama ";
        cin >> a;
        cout << "Angka kedua ";
        cin >> b;
        hasil = a / b;
        cout << "Hasilnya adalah = " << hasil;
        getch();
    }
   
    return 0;
}
Untuk penjelasannya dibawah ini adalah bagian awal atau header dari script yang kita buat.
#include<iostream>
using namespace std;

Untuk deklarasinya adalah seperti dibawah ini
int s;
int hasil;
int a,b;

sedangkan untuk badan programnya dimulai setelah "int main(){ dan diakhiri dengan tanda kurung }.

demikian itu merupakan source code yang telah saya buat, jika ada pertanyaan silakan melalui komentar. semoga yang saya sampaikan dapat bermanfaat dan teruslah untuk meningkatkan kemampuan coding kalian agar skill terus meningkat.

[ Update ] Cheat LostSaga Indonesia 8, 9, 10 Februari 2017 - Full feature battle yang pasti mantap jiwa :v, langsung saja comot cheat nya :D


Feature Hack's :

  • Fast Delay Gauge Skill
  • Unlimited Pasif Skill
  • Unlimited Health
  • Respawn Invincibility Effect
  • Flood Suicide 
  • Fast Hit 
  • Fast Get Up
  • Max Combo
  • Run Speed Hack
  • Brust Hero [ Mafia, Cowboy, Treasure Hunter, Hazama, Sorcerer, dll ]
  • Ghost Body
  • Anti Hit
  • End Action 
  • Hack Peso & G-Cash CS [ Client Side ]
  • Refill Token Perunggu CS [ Client Side ]
  • Magnet NPC
  • Flood Drop NPC
  • Freeze NPC
  • One Hit NPC
  • Teleport Dungeon
  • Skip Floor Crusade 
  • Unlock Slot 16 Player All Room
  • Cadet War 
  • Hack Level Fhising CS [ Client Side ] 
  • Hack Faction Point / FP CS [ Client Side ]
  • Bounce Killer
  • Spectactor Mode
  • No Lose & No Penalty
  • No AFK
  • No Gravitasi Mode
  • Costume Ladder
  • Costume Mode
  • Change Team
  • Join Team 
  • Unlock Buy Style Shop Item 
  • Lag Mode
  • Unlimited Inventory
  • Pecat Hero Permanen 
  • Unlimited Token Perunggu
  • Unlock Join All Faction
  • Replace Hero, Weapon, Armor, Helm, Acc [ Full Replace ]  
  • Replace Slot ++
  • Status +20, +30, +40, +50
  • Beyond Hero
  • Gender Famele
  • Zombie Mode
  • Crown Mode
  • Hack Durasi Hero Permanen CS [ Client Side ]
  • Hack Durasi Hero Trial CS [ Client Side ]

Tutorial Menggunakan Cheat :

  • Extract File Cheat Yang Sudah Di Download
  • Buka Cheat Dengan Run As Administrator
  • Buka & Login LostSaganya
  • Cheat Akan Otomatis Terinject
  • Cheat Active
  • Happy Cheating

*Support All Windows
*Main Wajib Window Mode
*On Kan Feature Pas Battle & Off Kan Setelah Selesai Pertandingan / Out Room

 
*Apabila Anda Mengalami Permasalahan Error Pada Saat Membuka Injector / Cheat Silahkan Klik & Baca Disini 


Link Download : 

Server 1

UPLOAD.EE


Server 2

SENDSPACE


Penggunaan komputer atau laptop memang sudah tidak asing lagi bagi kita. Namun, masih banyak juga yang belum mengerti masalah yang terjadi pada komputer tersebut, khususnya penggunaan RAM dan CPU yang boros.
Maka dari itu, melalui artikel ini Jaka akan memberikan cara mengatasi penggunaan RAM dan CPU yang boros untuk komputer serta laptop yang menjalankan sistem operasi Windows 10. Seperti apa ya?


5 Cara Mengatasi Penggunaan RAM dan CPU yang Boros

1. Registry Hack


  • Tekan tombol Windows + R dan ketik Regedit lalu tekan Enter.
  • Ketik HKEY_LOCAL_MACHINE\SYSTEM\CurrentControlSet\Control\Session Manager\Memory Management.
  • Cari ClearPageFileAtShutDown dan ubah nilainya menjadi 1.
  • Restart komputer kamu.

2. Perbaiki Masalah Driver


  • Klik Start.
  • Ketik Device Manager.
  • Klik Action dan pilih Scan for hardware changes.

3. Atur Windows 10 ke Performa Terbaik


  • Klik kanan di ikon Computer dan pilih Properties.
  • Pilih Advanced System Settings.
  • Pilih System Properties.
  • Klik Settings.
  • Pilih Adjust for best performance dan klik Apply.
  • Terakhir, klik OK dan restart komputer kamu.

4. Nonaktifkan Program yang Berjalan


  • Tekan tombol Windows + R.
  • Ketik msconfig dan tekan Enter.
  • Jendela Task Manager akan terbuka, dan klik tab Startup dan kamu bisa melihat program yang sedang berjalan.
  • Klik kanan pada aplikasi yang sedang berjalan dan pilih Disable.

5. Defrag Hard Drive Kamu


  • Tekan tombol Windows + R.
  • Ketik dfrgui dan tekan Enter.
  • Di jendela baru, pilih hard drive yang mau kamu defrag.
  • Klik Optimize dan ikuti instruksi mudah selanjutnya sampai selesai.

Itu dia 5 cara mengatasi penggunaan RAM dan CPU yang boros. Terima Kasih telah berkunjung semoga artikel tersebut bermanfaat.

pada kesempatan kali ini kembali saya akan memposting game perang yang sangat seru dan menyenangkan yang tentunya dengan tampilan grafik yang sangat bagus dan halus yaitu Call of Duty 4 Modern Warfare.


Sedikit ulasan, game ini menceritakan tentang perang yang terjadi di negeri timur tengah dan perburuan seorang gembong narkoba yang mempunyai jaringan mafia narkoba internasional yang sangat licin
Dalam perjalanan menyelesaikan misi ini sobat harus mempunyai skill dan ketangkasan dalam berperang karena memang tidak mudah untuk bisa menangkap si gembong narkoba tersebut.
 
Dari segi tampilan CoD 4 Modern WarFare ini memiliki grafik yang sangat bagus dengan efek peperangan dan alam  yang lebih detil dan halus sehingga terlihat sangat realistis.
Silahkan unduh game seru ini pada link download di bawah, tapi perhatikan dulu spesifikasinya apakah PC/laptop sobat memenuhi syarat untuk memainkan game ini atau tidak, cek pada system requirements di bawah.

Sebagai catatan, bahwa Game CoD 4 Modern WarFare ini sudah diRepack dan dikompress sizenya agar lebih kecil sehingga menjadi lebih ringan dalam proses Upload dan Download, makanya jangan kaget bila  Game yang yang diDownload sizenya sekitar 1,92 GB, setelah installasi akan berubah menjadi sekitar 5,6 GB.

Screenshot:


  SPESIFIKASI YANG DIBUTUHKAN   
Minimum System Requirements:
  • CPU : Pentium 4 2.4 GHz/ Athlon 64 2800+ (Intel & Athlon 1.8 GHz Dual Core or better supported)
  • CPU : Speed  Pentium 4, 2.4 GHz/ Athlon 64 2800+ (Intel & Athlon 1.8 GHz Dual Core or better supported)
  • RAM :  512 MB (768 MB for Windows Vista)
  • OS : Windows XP/Vista/7
  • Video Card : 128MB 3d Hardware Accelerated card required-100% 
  • DirectX 9.0c compatible and latest drivers (NVIDIA GeForce 6600+ / ATI Radeon 9800 Pro+)
  • DirectX version : 9.0c
  • Sound Card : Yes
  • Free Disk Space :  8 GB of uncompressed free hard disk space (plus 600 MB for Windows swap file)
  • DVD-ROM: 6X DVD-ROM

Recommended System Requirements :
  • CPU :  2.4 GHz dual core or better
  • CPU Speed :  2.4 GHz dual core or better
  • RAM :  1 GB (2 GB for Windows Vista
  • OS: Windows XP/Vista
  • Video Card : 3.0 Shader Support recommended. Nvidia Geforce 7800 or better or ATI Radeon X1800 or better
  • DirectX version:  9.0c
  • Sound Card : Yes
  • Free Disk Space :  8 GB of uncompressed free hard disk space (plus 600 MB for Windows swap file)
  • DVD-ROM :  6X DVD-ROM

Petunjuk Install :
  • Sebelum melakukan Installasi, Anti Virus harus dimatikan (Disable) sementara
  • Download semua Part, tempatkan dalam satu folder baru
  • Klik kanan pada Part 1 dan pilih Extract Here, otomatis semua part akan ikut terExtract
  • Akan muncul satu folder yaitu [Risandrooid]_Call Of Duty 4 Modern Warfare    
  • Masuk ke folder tersebut dan jalankan Install.exe untuk mulai pemasangan
  • Selesai
Status: Test by me; Windows 7 (32 & 64 bit)


Link Download : 

Part 1 [ 500 MB ]

Google Drive


Part 2 [ 500 MB ]

Google Drive


Part 3 [ 500 MB ]

Google Drive


Part 4 [ 474 MB ]

Google Drive

Author Name

Formulir Kontak

Nama

Email *

Pesan *

Diberdayakan oleh Blogger.